The battle over the TV remote is a classic family drama. But the real fight is usually over the volume. One person needs it cranked up to hear the dialogue, making it way too loud for everyone else. It’s a simple problem that can ruin a relaxing movie night. The perfect solution? A personal listening zone. This guide shows you exactly how to add bluetooth headphones to tv, step-by-step. We’ll cover the best way to connect headphones to tv so you can finally end the volume wars and enjoy your shows in peace.
Key Takeaways
- Confirm Your TV’s Bluetooth Status: Your first step is to check your TV’s sound settings for a Bluetooth option. If you don’t find one, a simple Bluetooth transmitter can plug into an audio output port (like the optical or headphone jack) to give any TV wireless capabilities.
- Choose Headphones Designed for Dialogue: When watching TV, clear conversations are the most important thing. Look for headphones that prioritize voice clarity and have simple, easy-to-use controls, rather than models with heavy bass made for music.
- Fine-Tune Your Audio for the Best Experience: After connecting your headphones, go into your TV’s sound settings to fix any lip-sync delays and select a “Clear Voice” mode. This final step ensures the audio is perfectly synced and optimized for your hearing.
Does Your TV Have Bluetooth?
Before you can connect wireless headphones, the first step is to figure out if your television has built-in Bluetooth. Many modern smart TVs come with this feature, but it’s not always a given, especially with slightly older models. Think of Bluetooth as the invisible cord that connects your headphones to the TV, letting you hear the audio without being tethered by a wire.
Finding out if your TV is Bluetooth-ready is usually a quick process. It often just takes a few minutes of exploring your TV’s settings with your remote control. If it turns out your TV doesn’t have Bluetooth, don’t worry. There are simple and affordable solutions to get you connected, which we’ll cover later on. For now, let’s focus on checking what your TV is capable of right out of the box. This simple check will determine your next steps and help you get the best possible sound experience.
Check Your TV’s Settings Menu
The easiest way to see if your TV has Bluetooth is to look through its settings menu. Grab your TV remote, press the “Settings” button (it might look like a gear icon or be labeled “Menu”), and look for an option related to sound or audio. Within that menu, you should see a list of choices. Scan for words like “Bluetooth,” “Wireless Devices,” or “Sound Output.” If you find a Bluetooth option, you’re in luck! This means your TV can connect directly to wireless headphones. You can then select it to begin the pairing process with your device.
Consult Your TV Manual
If you couldn’t find a Bluetooth option in the settings menu, your TV’s original manual is the next best place to look. The manual is the definitive guide to all of your television’s features. Find the index and look for terms like “Bluetooth,” “wireless,” or “headphones.” The manual will tell you for sure if the feature is included and provide specific instructions for your model. If you can’t find the physical booklet, you can almost always find a digital version online. Simply search for your TV’s model number followed by the word “manual” to download a PDF copy.
Check the Audio Ports on Your TV
Whether your TV has Bluetooth or not, it’s a good idea to get familiar with its audio output ports. Take a look at the back or side of your TV where the cables plug in. You’re looking for ports labeled “Audio Out” or “Digital Audio Out (Optical).” These are the ports that send sound out of your TV. Common types include a red and white RCA port, a single Optical port (which often has a small flap covering it), or a 3.5mm headphone jack. Knowing which outputs you have is essential, especially if you need to use a Bluetooth transmitter to add wireless capability to a non-Bluetooth TV.
Search Your TV Model Online
If you don’t have the manual and the settings menu isn’t clear, a quick online search can solve the mystery. First, find your TV’s model number. It’s usually printed on a sticker on the back of the television. Once you have it, type the model number into a search engine along with the question, “does it have Bluetooth?” You’ll likely find the official product page or support articles that list all of its specifications. This is also a great way to find user guides and tutorials specific to your TV. For example, major brands like Samsung provide detailed support for connecting devices.
How to Choose the Right Wireless Headphones
Finding the right pair of wireless headphones can completely change how you watch TV. It’s not just about blocking out distractions; it’s about catching every whisper of dialogue and enjoying rich sound without disturbing anyone else. But with so many options, the key is to focus on what truly matters for a great TV experience: simplicity, clarity, and comfort.
Ensure TV Compatibility
Before you start shopping for headphones, the first and most important step is to see what your television can handle. Most wireless headphones use Bluetooth to connect, which acts as an invisible cord sending sound from the TV to your ears. While many modern smart TVs have Bluetooth built-in, it’s not a standard feature on all models, especially older ones. Taking a moment to check your TV’s capabilities will make the entire process smoother. If it turns out your TV doesn’t have Bluetooth, don’t worry. There are simple and affordable adapters that can solve the problem, ensuring you can still get a great wireless audio experience.
The easiest way to see if your TV has Bluetooth is by looking through its settings menu. Using your remote, press the “Settings” or “Menu” button (this often looks like a gear icon) and find the “Sound” or “Audio” options. In that menu, look for terms like “Bluetooth,” “Sound Output,” or “Wireless Devices.” If you find a Bluetooth option, your TV is ready to connect directly. If you don’t see one, your TV’s original manual is the next best place to check. You can usually find a digital copy online by searching for your TV’s model number followed by the word “manual,” which will confirm its features for you.
Regardless of whether your TV has Bluetooth, it’s smart to get familiar with its audio output ports. Take a look at the back or side panel of your TV where the cables connect. You are looking for ports that send sound out of the TV, which will be labeled “Audio Out,” “Digital Audio Out (Optical),” or have a headphone symbol. The most common types are the red and white RCA ports, a single optical port (which often has a small plastic cover), or a 3.5mm headphone jack. Knowing which outputs are available is essential, as this is how you’ll connect a transmitter if your TV needs one to go wireless.
Opt for Simple, Intuitive Controls
When you settle in to watch your favorite show, you want technology that just works. Look for headphones with a simple design and intuitive controls. Large, easy-to-press buttons for volume and power are much more user-friendly than confusing touch controls or features that require a smartphone app. A dedicated charging dock is also a great feature—it gives your headphones a home and ensures they’re always charged and ready to go. The best headphones are the ones you don’t have to think about using.
Demand Clear Sound and Easy Volume Control
Many popular headphones are designed for listening to music, which means they often have heavy, booming bass. While great for a playlist, that excessive bass can make TV dialogue sound muddy and hard to understand. For television, you should prioritize sound clarity. Look for headphones that offer voice-enhancing technology or adjustable audio settings. This allows you to turn up the dialogue without having to crank up the volume on explosions and background music, giving you a balanced and clear listening experience.
Consider Battery Life and Wireless Range
Wireless headphones give you the freedom to move around without being tethered to the TV. Before you buy, check the wireless range. A good range means you can grab a drink from the kitchen without missing a single word. Battery life is just as important. You’ll want a pair that can last through a movie marathon or a full day of binge-watching. Look for models that offer at least 8-10 hours of listening time per charge, so you’re never left in silence mid-scene.
Choose Headphones You Can Wear for Hours
If you plan on watching TV for more than an hour at a time, comfort is non-negotiable. Many headphones are lightweight and have adjustable headbands for a custom fit. Pay attention to the earcup style. Over-ear headphones enclose your entire ear and are often the most comfortable for long sessions, as they distribute pressure around the ear instead of on it. Soft, breathable padding on the earcups and headband will also prevent discomfort, making your viewing experience that much more enjoyable.
Understanding Your TV’s Bluetooth Capabilities
Once you’ve confirmed your TV has Bluetooth, you might think you’re all set. However, not all Bluetooth connections are created equal. The specific features your TV supports can make a big difference in how you and your family experience movie night. For example, can two people use headphones at once? Can the headphones be used while the TV speakers are still on for others in the room? These are important details that vary from one TV model to another, even within the same brand. Taking a moment to understand these capabilities will help you create the perfect audio setup for your home and avoid any frustrating surprises. It ensures that your new wireless headphones will solve the volume problem exactly the way you hope they will.
Single vs. Multiple Device Connections
A common limitation you might run into is that most televisions are only designed to connect to one Bluetooth audio device at a time. This is a standard feature for many models, including a lot of Samsung TVs. This setup works perfectly if only one person needs to use wireless headphones. However, if two people want to watch with their own headphones, you might have a problem. Some of the very latest TVs are starting to include features like “Multi Connect,” which allows two Bluetooth devices to receive audio simultaneously. It’s a great feature, but it’s not yet standard, so it’s important to check your TV’s specifications if connecting multiple headphones is a priority for you.
Simultaneous Audio Output (Multi-output Audio)
This is one of the most important features to look for if you want to solve the household volume debate. “Multi-output Audio” is a setting that allows sound to play from both your TV’s internal speakers and a connected Bluetooth device at the same time. This is the ideal solution for many families. The person who needs higher volume can listen through their headphones at their preferred level, while everyone else in the room can hear the TV through its speakers at a normal volume. It creates two independent audio zones, allowing everyone to enjoy the same show together, comfortably. If your TV has this feature, you’ll usually find it in the “Accessibility” or “Audio” section of your settings menu.
Potential Feature Conflicts
It’s also good to know that using Bluetooth might disable some of your TV’s other audio features. Your TV’s internal hardware can sometimes only manage one complex audio task at a time. For instance, if you have a wireless soundbar connected via a feature like TV SoundConnect or a Wi-Fi surround sound system, connecting a pair of Bluetooth headphones might automatically turn those other systems off. This isn’t a malfunction; it’s just a limitation of the TV’s processor. If you use other audio equipment, you may need to check your manual or do a little experimenting to see how everything works together. This will help you create a setup that doesn’t cause any conflicts.
How to Add Bluetooth Headphones to Your TV
Okay, you’ve confirmed your TV has Bluetooth and you have your wireless headphones ready. Now for the fun part: getting them connected so you can enjoy your shows. This process is usually quick and painless. We’ll walk through each step together to get you set up in just a few minutes.
Put Your Headphones in Pairing Mode
First, you need to tell your headphones you want to connect them to a new device. This is called putting them in “pairing mode.” For most headphones, this involves pressing and holding the power button or a dedicated Bluetooth button for a few seconds until a light starts flashing. Every model is a bit different, so it’s a good idea to check the instructions that came with your headphones if you’re not sure. Once they’re in pairing mode, they’re ready to be discovered by your TV.
Stay Close to the TV
Now that your headphones are in pairing mode, your physical location matters. Think of the pairing process as a quiet introduction between your headphones and your TV. For them to hear each other clearly, they need to be close. It’s best to stay within three to five feet of your television during this initial setup. This proximity helps your TV quickly find your headphones and establish a strong connection without any interference. Once they are successfully paired, you’ll have more freedom to move around, but for this first digital handshake, staying nearby is the simplest way to ensure everything goes smoothly.
Connect Your Headphones to the TV
Now, grab your TV remote. Go into your TV’s main settings menu, which is often marked with a gear icon. Look for an option related to sound or devices, and then find the “Bluetooth” menu. Once you’re there, select the option to “Add new device” or “Search for devices.” Your TV will start looking for nearby Bluetooth signals. In a moment, the name of your headphones should appear on the screen. Simply select it from the list to complete the connection. Your TV should confirm when the pairing is successful.
Switch Your TV’s Audio Output
Sometimes, even after your headphones are paired, the sound might still come from the TV speakers. You just need to tell your TV where to send the audio. Head back into your TV’s settings menu and find the “Sound” or “Audio” section. Look for a setting called “Sound Output” or “Audio Output.” In that menu, you should see a list of options, including “TV Speaker” and “Bluetooth.” Select your newly connected headphones or the general “Bluetooth” option. The sound should now play directly through your headphones.
How to Fix Audio and Video Sync
Occasionally, you might notice that the sound from your headphones doesn’t perfectly match the picture on the screen. This is often called a “lip-sync error,” and it can be distracting when dialogue is out of step with the actors’ mouths. Many TVs have a built-in tool to fix this. In your TV’s sound settings, look for an “AV Sync Adjustment” or “Audio Delay” option. This feature lets you manually adjust the timing of the audio until it lines up perfectly with the video, creating a much smoother viewing experience.
Adjust Settings for Clearer Dialogue
To get the best possible sound, especially for hearing conversations clearly, take a moment to explore your TV’s audio settings. Many televisions offer different sound modes like “Movie,” “Music,” or “Standard.” Look for one called “Clear Voice,” “Dialogue Enhancement,” or something similar. This mode is specifically designed to make speech stand out from background noise and music. If your headphones have noise-cancelling features, turning them on can also make a huge difference by blocking out distracting room sounds, allowing you to focus completely on your show.
What If Your TV Doesn’t Have Bluetooth?
So, you’ve checked your TV and discovered it doesn’t have built-in Bluetooth. Don’t worry, this is a common situation, especially with slightly older models, and it doesn’t mean you’re out of luck. You can still get crisp, clear audio delivered directly to your ears without buying a new television. There are several simple devices that act as a bridge between your TV and your wireless headphones, and setting them up is usually a breeze. Most of these solutions involve plugging a small gadget into one of your TV’s audio output ports. Once connected, you’ll be able to pair your headphones and enjoy your favorite shows at a volume that’s perfect for you. Let’s walk through the best options available so you can find the one that fits your setup.
Try a Bluetooth Transmitter
The most popular solution is a Bluetooth transmitter. Think of it as a small adapter that gives your TV Bluetooth capabilities. This device plugs into one of your TV’s audio output ports—like the 3.5mm headphone jack or the optical audio port—and then wirelessly sends the sound to your headphones. Setup is typically very straightforward: just plug the transmitter into the TV and a power source (usually a USB port), then put your headphones in pairing mode. It’s an affordable and effective way to add Bluetooth to a TV and finally hear every word of dialogue without issue.
Look for aptX Low Latency Support
When you’re shopping for a transmitter, you might see the term “aptX Low Latency” mentioned. While it sounds technical, the concept is simple: it prevents that annoying delay between what you see on screen and what you hear in your headphones. This lag, or latency, is what causes the audio to fall out of sync with the actors’ mouths. To ensure the sound matches the picture perfectly, it’s crucial to select a transmitter that supports aptX Low Latency. This technology significantly reduces audio delay, making sure dialogue and action are perfectly aligned for the best viewing experience.
Test Different Audio Ports
Once you have your transmitter, you’ll need to plug it into one of your TV’s audio output ports. Most TVs offer a few options, like a 3.5mm headphone jack, a Digital Optical port, or red and white RCA ports. If you connect the transmitter and the sound quality isn’t what you expected, try switching to a different port. Sometimes, the Digital Optical connection provides a clearer, more stable signal than the headphone jack. Familiarizing yourself with your TV’s audio outputs is essential because it helps you select the right device and troubleshoot any issues that might come up.
Check for Other Audio Connection Options
Before you buy a transmitter, take a quick look at the back of your TV to see which audio outputs you have. Most TVs have a few options. You’ll likely see a headphone jack (the same kind on a phone or laptop), a digital optical port (a small, square-shaped port that often has a red light inside), or red and white RCA ports. Any of these can be used to connect a transmitter. Knowing which TV ports you have available will help you choose the right transmitter with the correct cables, ensuring you can get everything connected without a hitch.
Use an HDMI ARC Adapter
Another option involves the HDMI ARC port. ARC stands for “Audio Return Channel,” and it’s a special feature of some HDMI ports that allows them to send audio out from the TV to a soundbar or receiver. While less common for headphones, you can use an HDMI ARC adapter or extractor. This device plugs into the HDMI ARC port and provides a separate audio output, like an optical or 3.5mm jack, that you can then connect a Bluetooth transmitter to. This method is a bit more specialized but can be a great solution if your other audio ports are already in use.
Use a Streaming Device
If you use a streaming stick or box like a Roku, Apple TV, or Chromecast, you might have another way to listen wirelessly. Many of these devices have their own Bluetooth capabilities. For example, if you have a Roku, you can download the Roku remote app on your phone. The app has a feature called “private listening mode” that sends the TV’s audio right to your phone, which you can then listen to with your connected headphones. Apple TV makes it very easy to connect Bluetooth headphones like AirPods directly through its settings. Some Chromecast models also support Bluetooth, though you may need to sit a bit closer to the TV for a stable connection.
Connect Through Your Game Console
For those who have a PlayStation or Xbox, your game controller can double as a simple audio solution. While this method isn’t wireless for your headphones, it still gives you a private listening experience without needing a long cable stretching across the room. Most modern controllers for these consoles have a standard 3.5mm headphone jack right on them. You can simply plug in any pair of regular wired headphones to hear all the game and TV audio. It’s a straightforward and effective way to get sound directly to your ears without disturbing anyone else.
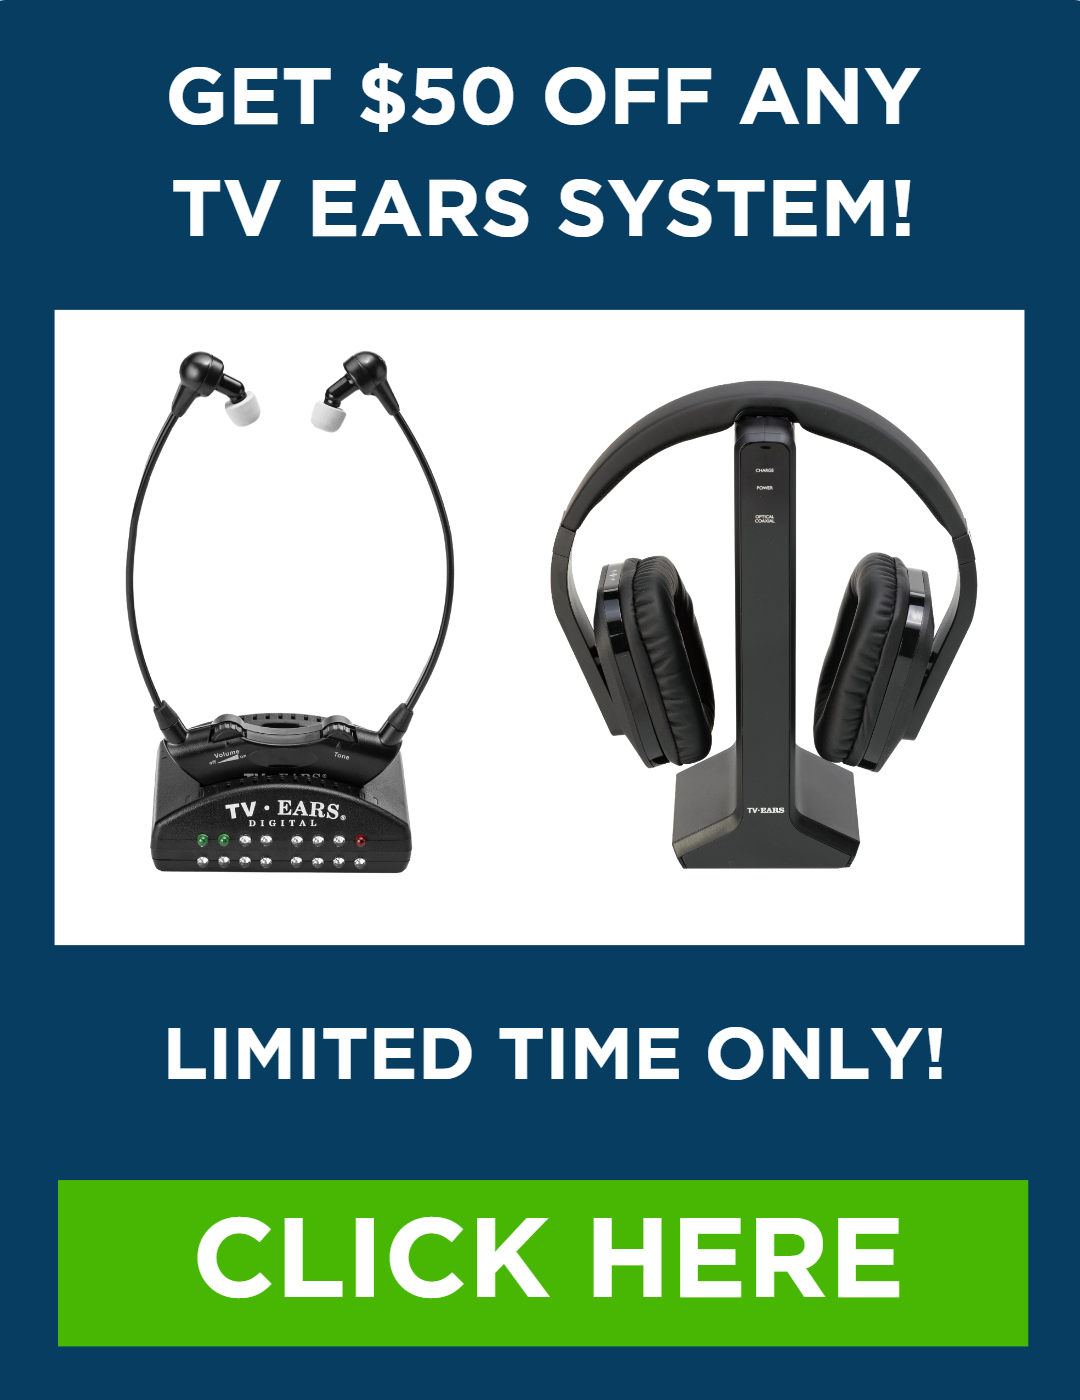
Look into RF Wireless Headphones
For a truly seamless experience, you might want to consider headphones that use Radio Frequency (RF) instead of Bluetooth. RF systems come with their own transmitter base that plugs directly into your TV. This technology is designed specifically for home entertainment and often provides a more stable connection over a longer range than Bluetooth. That means you can walk to the kitchen for a snack without the audio cutting out. Because they operate on their own frequency, RF wireless systems are also less prone to interference from other wireless devices in your home, giving you a consistently clear and reliable sound.
How to Get the Best Sound from Your Headphones
Getting your headphones connected is the first step. Now comes the fun part: making the sound work perfectly for you. Most people don’t realize how much they can adjust the audio to fit their hearing needs. Instead of just turning the volume up, you can fine-tune the sound to make dialogue clearer, action scenes more exciting, and the overall experience more enjoyable. It’s all about creating a personal sound bubble where every word and sound effect is crisp and clear. Let’s walk through a few settings you can explore to get the best possible sound from your wireless headphones.
Experiment with Sound Profiles (EQ)
Many wireless headphones come with preset sound profiles or an equalizer (EQ) you can adjust. These settings change the balance of high, mid, and low frequencies. You might see options like “Movie,” “Music,” or “Voice.” The “Voice” or “Dialogue” setting is often a game-changer, as it emphasizes the frequencies of human speech, making conversations much easier to follow. Some headphones are specifically designed to customize themselves to your hearing, which is incredibly helpful if you have some hearing loss. Play around with these settings to find the one that makes your favorite shows sound their best.
Use Volume Normalization for Consistency
One of the biggest benefits of using wireless headphones with your TV is creating your own personal volume level. You no longer have to argue with family members about the TV being too loud. You can set the volume in your headphones to a level that’s comfortable for you, while the TV’s main speakers can be turned down or muted completely. This gives everyone in the room control over their own listening experience. The versatility of wireless headphones means you can finally stop straining to hear the dialogue or blasting the sound for everyone else.
Play with Surround Sound Settings
Want to feel like you’re right in the middle of the action? Many headphones offer virtual surround sound modes. This technology creates a more immersive, three-dimensional soundscape, making movies and sports feel more dynamic and lifelike. You might see settings like “Cinema” or “Spatial Audio.” While it sounds complex, it’s usually as simple as pressing a button on your headphones or in a companion app. These various sound modes can truly enhance your viewing experience, especially for films with big, sweeping soundtracks or exciting action sequences.
Turn on Active Noise Cancellation (ANC)
If you find yourself getting distracted by background noise—like the hum of the air conditioner, the dishwasher running, or conversations in the next room—noise cancellation is a feature you’ll love. It uses microphones to detect and block out ambient sounds, so all you hear is the audio from your TV. This allows you to focus completely on what you’re watching without having to crank up the volume to drown everything else out. It’s perfect for creating an immersive listening bubble, giving you peace, quiet, and crystal-clear TV sound whenever you want it.
Solving Common Headphone & TV Issues
Even with the best technology, you can sometimes run into a little snag. Don’t worry—most common wireless headphone issues are easy to fix with a few simple adjustments. If you’re having trouble with your connection, sound quality, or anything else, walk through these steps to get everything working smoothly again so you can get back to your show.
How to Fix Audio Delays
Have you ever noticed that the words you hear don’t quite match the actors’ lips on screen? This is a common issue called audio delay or a lip-sync error. It happens when the video and audio signals don’t arrive at the same time. To fix this, go into your TV’s audio settings menu. Look for an option called “Audio Delay,” “Lip Sync,” or something similar. From there, you can manually adjust the timing until the sound and picture are perfectly aligned. Some headphones are also built with low-latency technology specifically to prevent this problem.
What to Do If Your Headphones Won’t Connect
If your headphones aren’t pairing with your TV, let’s try a quick reset. First, turn off your headphones and then turn them back on, making sure they are in “pairing mode.” Next, go to your TV’s Bluetooth menu, find your headphones in the list of devices, and select the option to “unpair” or “forget” them. Once they’re removed, start the pairing process from the beginning. This simple step often clears up any connection glitches. Also, make sure your headphones are fully charged and close to the TV when you try to connect.
Disconnect From Other Devices First
Sometimes, the reason your headphones won’t connect to the TV is that they’re already secretly connected to something else. Make sure your Bluetooth headset is not connected to any other device (like a phone or computer) at this time. Most headphones are designed to automatically reconnect to the last device they were paired with. So, if you were just listening to music on your phone, your headphones might still be linked to it. The simplest fix is to temporarily turn off the Bluetooth on your phone, tablet, or any other nearby gadgets. This ensures your headphones are available and looking for a new device to pair with—in this case, your TV—and prevents any connection confusion.
Keep Your Devices Updated
Just like any other piece of technology, your headphones and TV work best when they’re running the latest software. It’s a good habit to keep your headphones charged and update their software when new versions are available. These updates often include important performance improvements and bug fixes that can solve connectivity issues. The same goes for your television; manufacturers regularly release updates to improve compatibility with other devices. You can usually find a “Software Update” option in your TV’s settings menu. Taking a few minutes to check for updates every so often is a simple step that can prevent headaches and ensure your devices work together seamlessly.
How to Reduce Signal Interference
Is your audio cutting out, crackling, or stuttering? This is usually caused by signal interference. Bluetooth works best with a clear line of sight, so check for anything that might be blocking the signal between your headphones and the TV. Common culprits include other wireless gadgets like Wi-Fi routers, metal furniture, or even thick walls. Try moving your router a little further away if it’s right next to the TV. Sometimes, even just shifting your position on the couch can make a difference, ensuring your body isn’t blocking the connection.
Identify Other Sources of Interference
Your Wi-Fi router isn’t the only device that can disrupt your headphone’s signal. Other common household items, like cordless phones and even your microwave oven, can also cause problems. Many of these electronics operate on a similar wireless frequency, and their signals can sometimes get crossed, leading to that annoying crackling or stuttering sound. This is a common cause of signal interference. You don’t need to rearrange your whole house, but simply creating a little space between your TV setup and these other gadgets can often clear up the connection and give you a more stable audio experience.
Simple Tricks for Better Sound Quality
Once you’re connected, you can fine-tune the audio for the best listening experience. Explore your TV’s sound settings for different audio modes like “Movie,” “Music,” or “Clear Voice.” The “Clear Voice” or “Dialogue” setting is fantastic for making conversations easier to understand. If you’re still hearing distracting background noises in your room, headphones with active noise cancellation can help by filtering them out, allowing you to focus completely on the TV’s sound. A clear, crisp sound makes watching your favorite shows so much more enjoyable.
How to Maximize Your Headphone’s Battery Life
There’s nothing worse than your headphones running out of power in the middle of a movie. To avoid this, get into the habit of charging them after you’re done watching TV. Most wireless headphones will give you a warning when the battery is low, but it’s always best to start with a full charge. If you find you’re charging them constantly, remember that some models offer a much longer battery life than others. Many wireless TV listening systems also come with a convenient charging base, so your headphones are always charged and ready to go when you are.
Related Articles
- When looking for headphones for TV wireless is the best
- Enjoy TV Watching with Wireless Headphones for the TV
- Enhancing Your TV Viewing with Wireless Headphones – TV Ears® Official Store
- The Wireless Headphones for TV Experience
- Wireless headphones for tv’s: Many options, 1 top choice
Frequently Asked Questions
What’s the easiest way to connect wireless headphones if my TV doesn’t have Bluetooth? The simplest solution is to use a Bluetooth transmitter. This is a small device that plugs into one of your TV’s audio output ports, like the headphone jack or the optical port. It then sends the TV’s sound wirelessly to your headphones, effectively giving your older TV the Bluetooth capability it was missing.
Can I use my everyday music headphones for watching TV? You certainly can, but you might find the sound isn’t ideal. Headphones designed for music often emphasize bass, which can make dialogue on TV sound muddy or difficult to hear. For the best experience, look for headphones that prioritize voice clarity, as they will make conversations stand out from background music and sound effects.
If I use headphones, can other people in the room still hear the TV? Yes, in most cases they can. Many televisions allow you to play sound through both the Bluetooth headphones and the TV’s internal speakers at the same time. This is a great feature because it means you can have the volume set to your perfect level in your headphones, while everyone else listens at a lower volume through the main speakers.
The sound in my headphones doesn’t match the actors’ lips. How can I fix this? This is a common issue known as audio delay or a lip-sync error. The fix is usually found within your TV’s settings menu. Look for an “Audio” or “Sound” section and find an option labeled “AV Sync Adjustment” or “Audio Delay.” This tool will let you manually adjust the timing until the sound and picture line up perfectly.
My headphones keep cutting out or making a crackling sound. What’s causing this? That sound is usually a sign of signal interference. Bluetooth works best with a clear path between the transmitter (your TV) and the receiver (your headphones). Check to see if anything is physically blocking the signal, like thick furniture. Other wireless devices, especially Wi-Fi routers placed right next to the TV, can also cause interruptions. Try moving them a few feet away to see if it clears up the connection.